A basic guide to Firebase for the web
I've recently been tinkering with Firebase, and I have to admit, I am really impressed. I was a bit sceptical at first, but when I starting experimenting with the code samples on the site I was blown away. If you haven't heard of Firebase before, it is a platform that can power your app's backend, including data storage, user authentication, static hosting, and much more. Using Firebase allows you to build for any device, but I was particularly interested in the JavaScript implementation.

If you are a web developer, the great thing about the Firebase JavaScript implementation is that it allows you to store data using a NoSQL backend without writing any heavy backend code. It's great for quickly spinning up a prototype and testing out an idea with only client side code.
In this article, I am going to run through a basic implementation and show you how to store and display data in realtime using Firebase.
Getting Started
In order to get started, head over to firebase.com and sign up for an account. It's free up to 1GB and you only need to start paying when your data exceeds that. Once you've signed up for an account, a brand new Firebase app will automatically be created for you with its own unique database URL ending in firebaseio.com. We'll use this database URL to store and sync data.
To include the Firebase client library in your website, add a script tag to the section of your HTML file.
<script src="https://cdn.firebase.com/js/client/2.4.2/firebase.js"></script>
To read and write data, you need to first create a reference to the Firebase database. You can do this by passing the URL of your Firebase app into the Firebase constructor. In my case, I took the app name that was assigned when I created a new database.
var messagesRef = new Firebase('https://brilliant-fire-3159.firebaseio.com');
Now that we have created a reference to the Firebase database, we can start storing data against it. The following code gives you an idea of this in action.
In the code above, I am saving the value of the messageInput textbox in the database. You may notice that the data is being pushed as a JSON object. Due to the nature of NoSQL databases, you can store large amounts of unstructured data. There are no tables or records.
Realtime data
The great thing about Firebase is that it comes with built-in support for realtime data. When you save a record, it is synced to all connected clients in realtime. The data is also available when your app goes offline.
Data stored in a Firebase database is retrieved by attaching an asynchronous listener to a database reference. The listener will be triggered once for the initial state of the data and again anytime the data changes.
In order to listen for any changes, you would add the following code:
In the example above, the value event will fire once for the initial state of the data, and then again every time the value of that data changes. You don't need to write any extra code to make this happen - it's as easy as that! With just a few lines of code we've saved data to the Firebase database and asynchronously retrieved the data in realtime.
Storing data against a user
Another great feature that Firebase offers is the built in functionality for user authorisation. You can use the traditional email/password combination, as well as third-party providers such as Facebook, Twitter, GitHub, and Google. Once a user has authenticated, Firebase manages their session, ensuring that the user is remembered across browser or application restarts. Once each user has been assigned their unique Id, we can then store any data that is unique to that user in the database.
The code below gives you an idea of this in action:
There's a lot going in this code sample. Let's break it down a little.
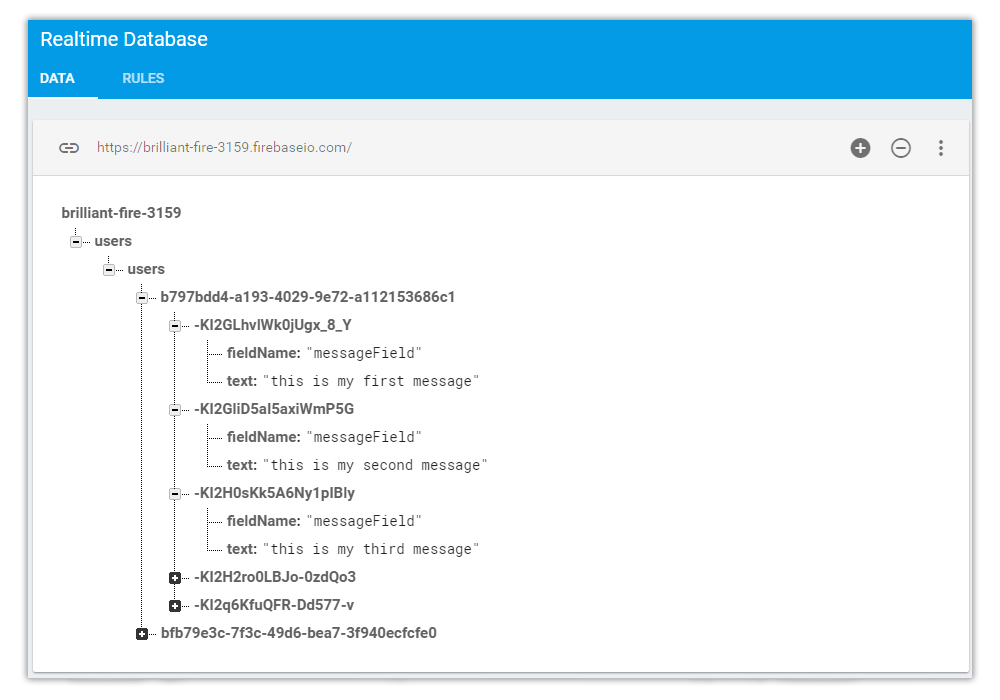
We want to store the data against a the current authenticated user, and in order to do so we store user data in the path https://
The authWithPassword() function is authenticating the user using the email and password provided. For the sake of this article, I am hard-coding the password and details into the code - this isn't production code!
When the user is authenticated using the onAuth() function, we set the userId so that we can store the users data against this Id. When the user submits the data, we save it against their unique userId. The code above also listens out for any changes to the data for this user and will update in realtime. By adding an event listener to the 'child_added' event for the given Id, we will get only that user's data.
You can log into the Firebase dashboard and view the data in your database. Once the data is stored in the database against a user, it looks something like the image below:

Summary
Firebase is a very powerful platform and I get very excited when I think about all the great things that could be built using this technology. Google also announced at Google I/O 2016 that Firebase would be expanding to become a unified app platform for Android, iOS and mobile web development.
There is also built in support for offline capabilities. Every client sharing a Firebase database maintains its own internal version of any active data. When data is updated or saved, it is written to this local version of the database. The Firebase client then synchronizes that data with the Firebase servers and with other clients when it re-establishes a connection. Using Firebase together with your Progressive Web App could produce some exciting results! I was also really impressed by the response times I was getting - around 3 milliseconds on average!
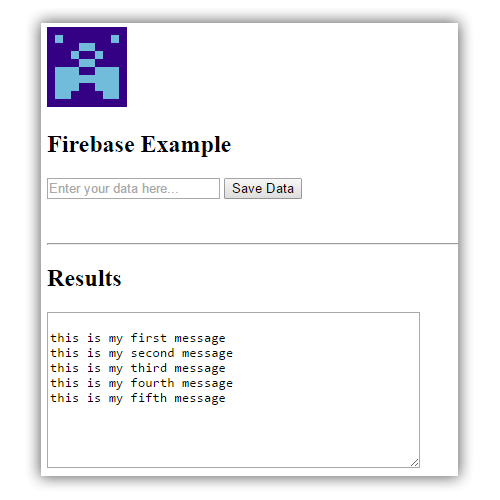
If you would like to see the code used in this article, please head over to the Github repo at github.com/deanhume/firebase-example. I have also created a simple working example to experiment with over at deanhume.github.io/firebase-example

If you'd like to learn more about the different features that Firebase offers, I recommend taking a look at their easy to follow documentation.
