A Simple HTML Minifier for ASP.NET
I have previously blogged about the importance of serving your users web pages with speedy load times. Poor web performance equals lost revenue and customers. As you continue to build and improve on the web performance of your site, you will need to look for ingenious ways to squeeze those precious milliseconds from your page load time.
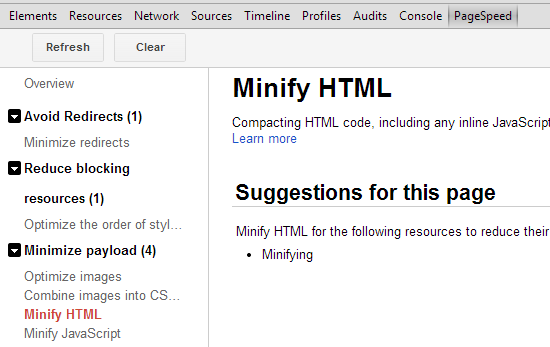
I often use the Google PageSpeed plugin to check the performance of my websites, as it provides handy tips to improve the overall performance and page load times. Whilst I was recently using the Google PageSpeed plugin, I spotted a rule that I haven't paid much attention to - up until now.

The Google PageSpeed best practices state that "Compacting HTML code, including any inline JavaScript and CSS contained in it, can save many bytes of data and speed up downloading, parsing, and execution time". This means that in the same way that you might minify your external JavaScript and CSS files, your page load times will also benefit from having minified HTML. Minifying HTML might seem like overkill, but on larger HTML pages it can be a great way to save on those precious bytes.
If you are an ASP.NET developer, there are currently a few options available to you. Mads Kristensen created an HTTP Module for ASP.NET that minifies HTML on the fly, and there is also a Nuget Package that minifies ASP.NET MVC Razor views. However, most of these options require you to process the HTML on the fly. I wanted to find a way to minify the files before I deployed them, so that there is zero overhead on the website. This is where the ASP.NET HTML Minifier comes in.
The ASP.NET HTML Minifier is a simple command line tool that simply strips out any whitespace in your HTML. The great thing about this tool is that it isn't only for MVC Views, it can be used for ASP.NET Web Forms, ASP.NET Views (Razor & Webforms) and plain HTML files. You simply need to specify the folder of your website, and it will crawl and minify all the appropriate files.
The best approach is to actually use the ASP.NET HTML Minifier as part of your build process and hook into the MSBuild files. In this article, you will learn how to use the ASP.NET HTML Minifier as part of your build process to effectively reduce the size of your HTML files.
Before we dive into the implementation, let's take a look at the before and after results of minification. I took a standard HTML file and ran it through the ASP.NET HTML Minifier.

In the table above, you can see the before and after results of the minification. By simply minifying the HTML, I managed to save around 20% off the original file size - awesome! This might not be the case with every file that you minify, but it can certainly make a difference on larger HTML files.
You also wouldn't want to minify your views or web pages while you are still in development, that is why it is better to use this tool and minify when you build and deploy the code.
Minifying on publish in Visual Studio 2012
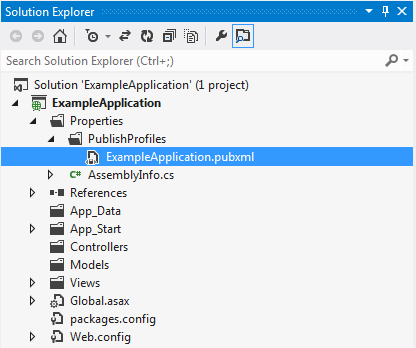
First, start off by downloading the HTML minifier command line tool from the Github repo. You can place this in a generic location as it can be shared amongst your different web applications as you need it. In order to add it to your build file, you will need to edit the publish profile in Visual Studio 2012. To do this, expand the properties folder in your Solution Explorer, then expand the PublishProfiles folder.

If you have previously deployed an application using the Publish Web feature in Visual Studio, you will notice that there is a file in this folder. In my case, there is a file called ExampleApplication.pubxml. You will need to edit this file and add a new target.
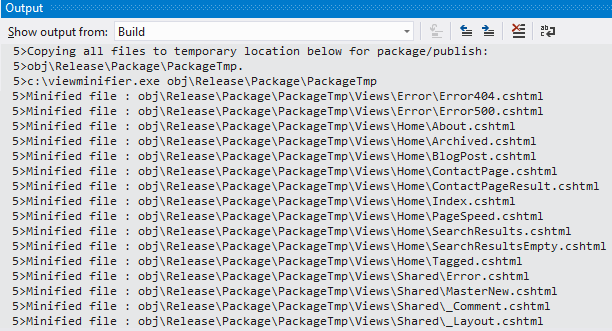
You will need to replace the Command location with the location that you copied the HTML Minifier to. That's it. Save the pubxml file and the next time that you publish the web project, the HTML Minifier will run and only minify the HTML files that get deployed. When publishing your application using Web Publish, you should notice the output window look something similar to the one below.

The secret to getting this to work is the "CopyAllFilesToSingleFolderForPackage" step in the build. For more information on MSBuild and the powerful features that it offers, check out the MSBuild page on the MSDN site
Get the source code
If you would like to view the source code, please take a look on the Github repo. Although it is a simple project, if you have any ideas for features please also feel free to contribute to the repo.
