Automated Testing with Selenium WebDriver and NUnit

I have recently been looking into an awesome tool called Selenium. What is Selenium? Well, it's a suite of tools that you can use to automate web application testing across many platforms. I recently attended a Selenium Users Group at the Google London Head Offices where they discussed the many usages of Selenium.

Why would you want to use it? Well, imagine you had a web application that did the same thing even after a new deployment. You would need to regression test the entire front-end of the application. With Selenium, you could automate all those tests and run them at the click of a button. Not only that, but you could integrate this into your build process! One of the presentations that were shown to us during the Selenium Users Group meeting was how Mozilla use Selenium to test the workings of Firefox. Previously they would have hundreds of front-end tests to run, but once they automated the process it took a matter of minutes!
At the moment the latest version of Selenium is available to download - Selenium 2. It is currently and alpha release, but it's still definitely available to use and is working well. I have recently been playing around with it to build some automated tests. It easily integrates with Visual Studio and Nunit (or any testing framework that you use), and the API is also really easy to use.
There is also a plugin for Firefox that is available for download. It has an easy to use GUI that records clicks, typing, and other actions to make a test, which you can play back in the browser. However, for this article I am going to write the unit tests using the Selenium 2 API.
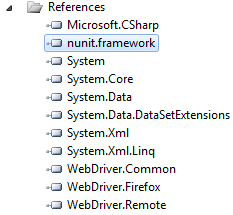
Let's get started. Once you have downloaded Selenium 2 from the website, you need to add a reference to the library in your project.
Then, we need to declare an instance of the WebDriver Interface.

Next I want the test to navigate to my blog's URL.

Once it has loaded the page, locate a Search Box in the HTML code, enter a value in the textbox and submit the page.

Finally I am just using Nunit to check that the title of the page is correct and matches my search entry.

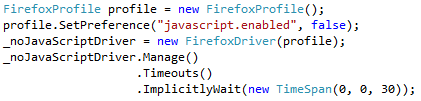
It's as easy as that! Okay, let's do something a little more detailed. If you access this blog without JavaScript enabled, a small message appears at the top of the page saying "This site is best viewed with JavaScript enabled". This is a personal preference and just appears because not all of the elements on this site work without JavaScript. Now, if I wanted to check that this message always appears without JavaScript disabled I could easily write a test to do this - and it can be run again and again in seconds.
This time - before we instantiate the WebDriver, we set the FireFoxProfile to have JavaScript disabled. After that we use the WebDriver as usual with the new profile.
After that, simply search the elements on the page for the matching HTML Table tag. Loop through the results and see if we have our messagebox.
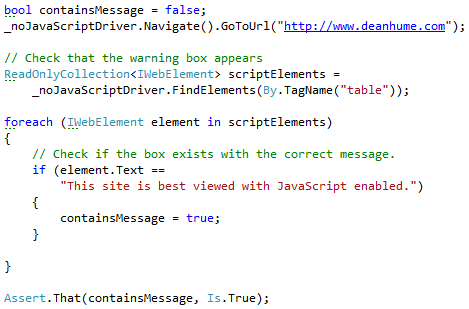
MessageBox found.....Wahey!!
One of the great things about this tool is that it has a driver for Firefox, IE and Chrome. So you can write you tests to run against all these browsers!
I have created a small demo project that is available for download. It contains the source code used in these examples as well as a few more.