Developing Applications for Windows 7

I've just got my hands on a shiny new computer, maxed out with new RAM and Windows 7. So far I am very impressed with Windows 7, although it looks pretty similar to Vista, its a lot slicker and I can't really seem to find any faults just yet. I also find developing a breeze as it seems a lot smoother when building larger solutions in Visual Studio.
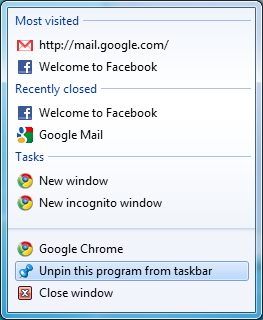
So, as with any new toy I decided it was time to get playing. I searched around and got my hands on the Windows 7 API code pack. There are some awesome new features in Windows 7, and this pack gives you access them. Jump Lists, Icon Overlay, Progress Bar, Tabbed Thumbnails, and Thumbnail Toolbars just to name a few. First off I started to look at Jump Lists. To open a Jump List, just right-click a program icon on the Windows 7 taskbar.
You can easily create these for your application and you can customize them too. There are a few apps out there that take advantage of this, check out Google's Chrome for Example.
Right, lets get started with our app. First we need to add a reference to the
Microsoft.WindowsAPICodePack and the Microsoft.WindowsAPICodePack.Shell.
If we want to create jump lists in an application add the following lines of code:
// Create the Category
JumpListCustomCategory customCategory = new JumpListCustomCategory("Resources");

JumpList jumpList = JumpList.CreateJumpList();
jumpList.AddCustomCategories(customCategory);

// Create the link to open
string systemFolder = Environment.GetFolderPath(Environment.SpecialFolder.System);

JumpListLink taskManager = new JumpListLink(Path.Combine(systemFolder, "taskmgr.exe"), "Task Manager");

// Add the link to the jumplist
jumpList.AddUserTasks(taskManager);

// Refresh the jump list
jumpList.Refresh();
The above code creates a category called Resources and a link under the category that points to the Windows Task Manager. Your jump list can be customized to include any links you need or anything that enhances the users experience. Next, I wanted to take a look at overlay icons on the taskbar. Icon overlays are small images placed at the lower-left corner of the icon that represents a Shell object. They are normally added to an object's icon to provide some extra information.
In order to use overlay icons you need to add the following lines of code:
StockIcon stockIcon = new StockIcon(StockIconIdentifier.Error, StockIconSizes.ShellSize, false, false);

TaskbarManager.Instance.SetOverlayIcon(stockIcon.Icon, "");
I recommend downloading the Windows API code pack and having a look at the samples provided, they cover everything you need to know and have some pretty easy to follow examples. The API pack also has support for sensors and power management, so it's pretty cool if your PC has these capabilities built in. The pack also contains loads of other samples that will help you take advantage of the new features in Windows 7.
I've included a small solution file that showcases the different features that I've written about in this post. It's not really a fully complete project, but it's a good start to get you developing with Windows 7 and WPF.
Download the sample solution for this article here.
For further reading check out these sites:
- http://www.developer.com/net/article.php/3846211/Take-advantage-of-the-Windows-7-TaskBar-in-your-next-project.htm
- http://www.codeguru.com/csharp/.net/net_general/tipstricks/article.php/c16621/
- http://blogs.microsoft.co.il/blogs/sasha/archive/2009/02/16/windows-7-taskbar-overlay-icons-and-progress-bars.aspx