Ten Things you didn't know about WebPageTest.org
That's a pretty catchy title for an article, right?! Now that I've lured you onto this page, I am going to do my best to deliver the goods! Without a doubt, WebPageTest is one of my favourite web performance testing tools. It's completely free to use and is such a powerful way to test your web pages from different locations all over the world.
If you've used WebPageTest before you'll know how easy it is to get a load of detailed information in just a few clicks, but did you know that there are a load of features that you've probably never heard of?
I recently attended Velocity Conference in Santa Clara and managed to corner Pat Meenan (the creator of WebPageTest) and ask him a few questions about WebPageTest. In this article, I am going to give you my list of the top ten coolest features of WebPageTest that you (hopefully) didn't already know about! In true clickbait style, I am going to countdown the list from number 10.
10. Simulating a Single Point of Failure
There’s a good chance that your website relies on 3rd party libraries to provide you with extra functionality. Tracking scripts, A/B testing and adverts are just a few of the many reasons why you would want to use a 3rd party library. The problem is that if the library that you use is hosted on another server, you risk creating a single point of failure (SPOF). If for any reason the server that is hosting these libraries goes down, or is slow to respond, your site will unfortunately be affected by this. It can happen to anyone!
In order simulate this using WebPageTest, test the site as you normally would, but you'll need to ensure that the domain(s) of the 3rd party are blocked. For example, if you wanted to test ccn.com you would copy the following domains and paste it into the SPOF tab.
It should look a little something like the image below when pasted.
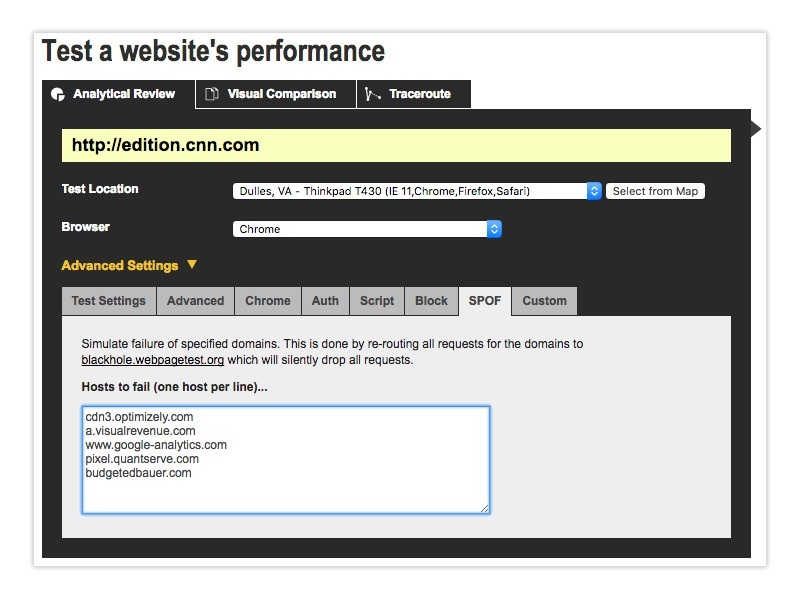
When you view the video for this site, you'll notice that you've simulated a SPOF and the site should take significantly longer to load. For the above test, it took over 20 seconds for the site to finally load! It's a great way to test how your site would respond under such circumstances.
9. Create your own personal WebPagetest instance
Using the public WebPageTest instance is great - it's free to use and you can quickly get to the information that you need, but it is limited. On a busy day you might find yourself in a queue and waiting for a while before your test results get processed. If you regularly use WebPageTest for business purposes, you might want to create your own private WebPageTest instance.
Pat Meenan wrote a handy guide entitled WebPagetest Private Instances in Five Minutes which runs through the basics of setting your own instance up using Amazon's EC2. The agents are available as AMI's in all of the EC2 regions and you can configure your own if you need testing inside of your corporate firewall.
Using your own instance is great because you control the testing infrastructure and there is no limit on the number of API requests that you can make.
8. Script login steps
Believe it or not, WebPageTest isn't just for testing public facing websites - you can actually script the login steps to your website if needed. WebPageTest has a scripting capability that lets you automate a multi-step test (for example, logging into a site or sending an e-mail message).
For example, if you wanted to script the login steps for the AOL website you might do something similar to the following:
Just remember not to put your important login credentials in there, because unless you explicitly set them to be private, the tests on webpagetest.org website are public! If you'd like to learn more about scripting, I recommend checking out the following link.
7. The Speed Index metric was invented by WebPagetest
True story! The Speed Index metric was added to WebPagetest in 2012 and measures how quickly the page contents are visually populated. It is quite useful if you are trying to compare different pages against each other (before/after optimizing, my site vs competitor, etc) and should be used in combination with the other metrics (load time, start render, etc) to better understand a site's performance. If you'd like to learn more about Speed Index, the following link gives you more detail.
6. Collect your own custom metrics
WebPageTest produces a plethora of helpful metrics, but did you know that you can also collect your own custom metrics? WebPagetest can execute arbitrary JavaScript at the end of a test to collect custom metrics. These can be defined statically in the server configuration or be specified at runtime on a per-test basis.
In fact, the defined custom metrics can also override built-in metrics. This becomes useful for the "result" where you can force a test to fail based on a JavaScript validation check. The HTTP Archive also collects several of it's stats through custom metrics.
5. Integrate WebPageTest results into your CI tests
If you are looking to ensure that every time new code is deployed it doesn't regress all of the hard work you've done around your web performance, the magic of WebPageTest can help! You could set a “budget” against on your page and if it exceeds the budget it would cause your tests to fail. Tim Kadlec created a useful Grunt task that uses either a public or private instance of WebPagetest to perform tests on a specified URL. Marcel Duran also created a WebPageTest API wrapper for NodeJS, allowing you to customize exactly how you want your tests to run.
It's important to ensure that the performance of your website is checked every time new code is released. Remember kids, web page performance isn't just for Christmas, it's for life!
4. You can customize the way the waterfall chart appears
Did you know that you can customize the way the waterfall chart appears in WebPageTest? Once you've run a test, click on the waterfall image and scroll down a little bit. You'll notice a link entitled "customize waterfall".
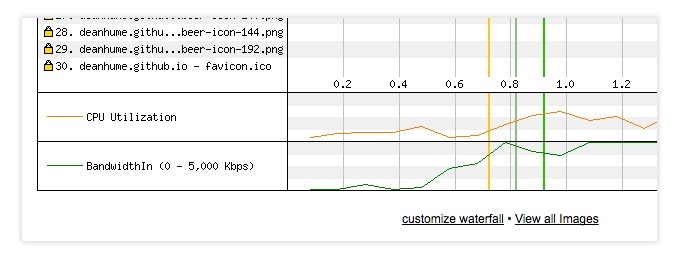
Click on the link and it will allow you to customize how you want the waterfall chart to appear. Very useful!
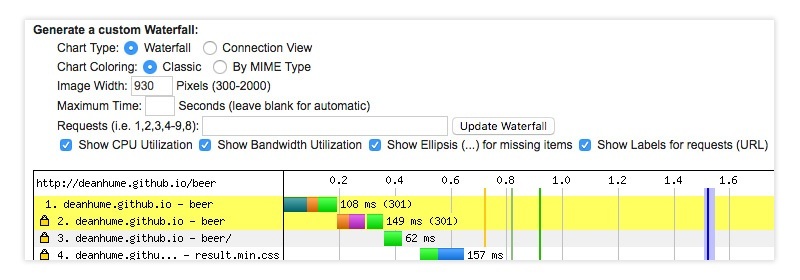
If you find yourself using waterfall charts in your presentations, this feature allows you to highlight exactly the bits that you are trying to call out.
3. Compare multiple tests in test history
The test history page allows you to see a list of tests that have been run against a specific instance. The great thing about this page is that you can visually compare multiple tests for filmstrip comparison.
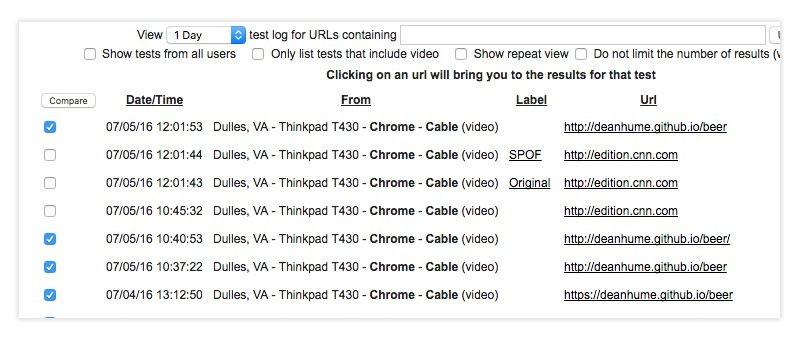
Select the tests you'd like to compare and you'll be presented with a helpful filmstrip comparison of all the past tests that you have run.

It's worth mentioning you should try and label your tests when you run them. This way it helps you to find the test in the history, but also gives you a labelled view when you display it in the filmstrip / video.
2. You can contribute to the WebPageTest codebase
The entire WebPageTest codebase is open source! The code base is on Github and contains the code for both the Web UI and the code for running the tests on various browsers. Pat also mentioned that the code is under a very liberal BSD license which means that you are also welcome to use any parts of the project for your own purposes (commercial or otherwise).
If you think there is something that could benefit the community then please contribute to this awesome tool!
1. Find out if your JavaScript execution causing a bottleneck
JavaScript is taking over the world! This also means that JavaScript execution is becoming a serious bottleneck in our browsers. Did you know that you can actually expose the breakdown of the main thread as it runs on a device using WebPageTest?
Before you run your next test, head over to the Chrome tab and select "Capture Dev Tools Timeline".
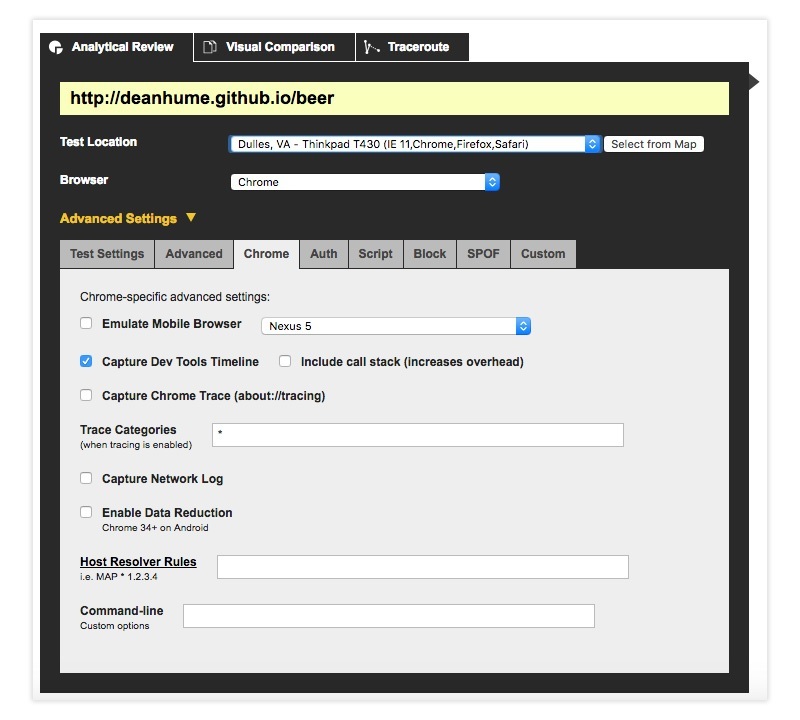
Once the test is complete, click on "Processing Breakdown" you'll get a detailed view of the main thread processing breakdown. This is a great way to find out exactly how your website runs on a real device by showing you the breakdown of the main thread.
Summary
And that's it! For those of you that regularly use WebPageTest, I hope there is something new in this article for you too. Many thanks to Pat Meenan for his help checking over my facts and for the insider tips!
